
Intro
While it isn’t in my Bio, I am also a huge weather nerd. I love diving into a radar, spotting tornados, and being eyes in the sky for friends and family. With that, I decided to take my love for weather to the next level and purchase a weather station. This is a highly rated system in the hobbyist community and has a huge following by various sources such as PWSWeather and Wunderground.
Recon
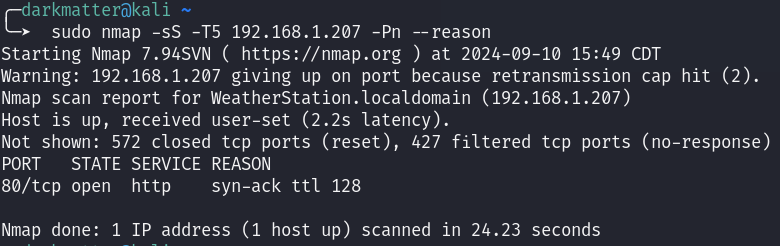
With the beginning of every test I am conducting, whether it be an IoT device, Web Application, Server, my tests always begin with a quick port scan. Scanning this device, I didn’t expect their to be much other than a Web Server and possibly a random TCP or UDP port for possible data transfer to and from the weather vain.
Assumptions were correct and there is an HTTP service running on port 80.
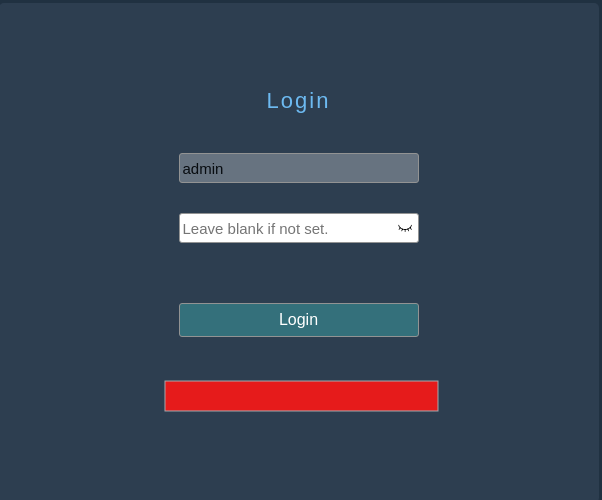
Heading over to our Web Application, I get a pretty generic login page. It doesn’t seem like there is much here and by default the username is locked to admin (that makes password spraying a lot easier).
Now it is time to fire up BurpSuite and see what we are working with. Step one for me is usually some generic combination of a username:password such as, admin:admin or admin:password. Since this is auto-populated with a hardcoded username, this makes our lives a bit easier.
So lets get our proxy going and toss password in as an option. The first thing I noticed in the Request is a pretty standard POST request that obfuscates my password in some way. Working for years in a SOC, you can easily spot that this is Base64.
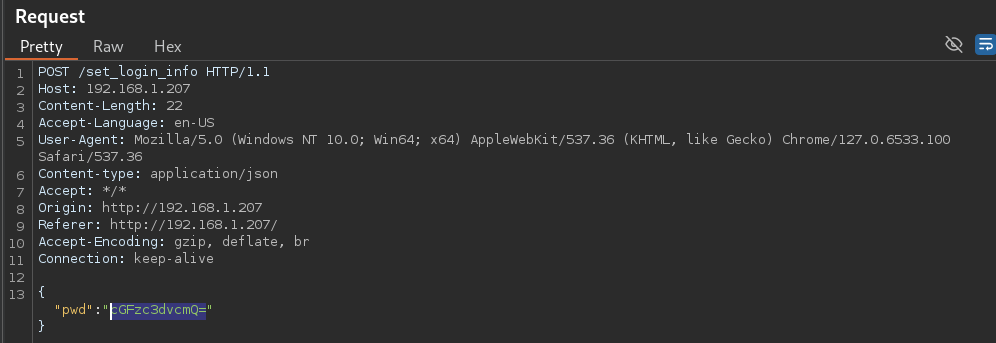
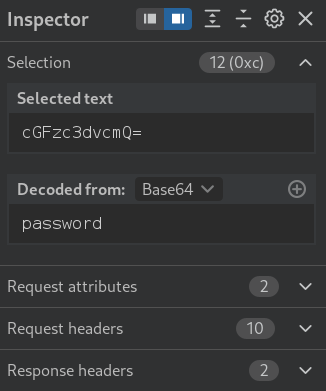
Sure enough, Inspector was able to decode the hash and find that it was indeed Base64 and the password value is poorly obscured with Base64, making this easy to intercept and decode as the service is being served over HTTP.
Attacking
Alright, now that we know there is limited security implementations in place, it was time for me to give a few other methods for the login field a try. Threw some XSS and SQLi at it and to my surprise, it seemed like we didn’t have a foothold.
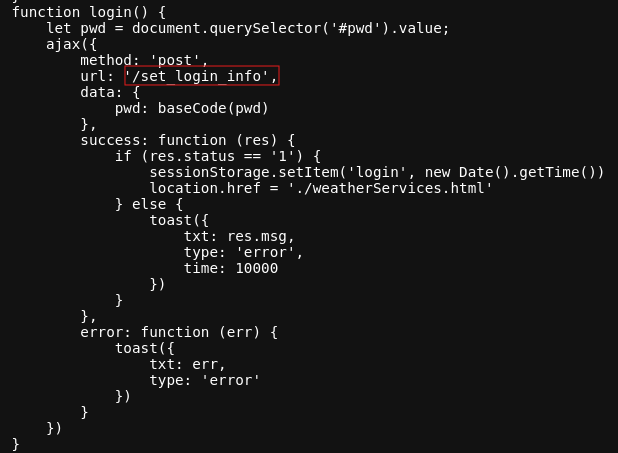
Taking time and moving away from hitting the password field for now, I decided to take a look at the login page source code. The source code is pretty verbose and had a few items that piqued my interest.
At first glance, I see two URL mentions with similar naming conventions. <word>_<word>_info. Looking a tad further in the code, there is an endpoint that is commented out that gives a bit more information with a get_<word>_info. With this information, I figured I would try my luck with a fuzzer against a common directory wordlist to see if we can find any other hidden endpoints.

Using the tool, FFuF (tons of options out there, find one that works best for you), I stage my fuzzer to test the URL string get_FUZZ_info which we have previously found by inspecting the source code files. Stagging this scan, I have little hope that this will work, but it is a test worth conducting! You know know what you will find.
After a few minutes of running my fuzzer, we get two hits! WOOHOOO!
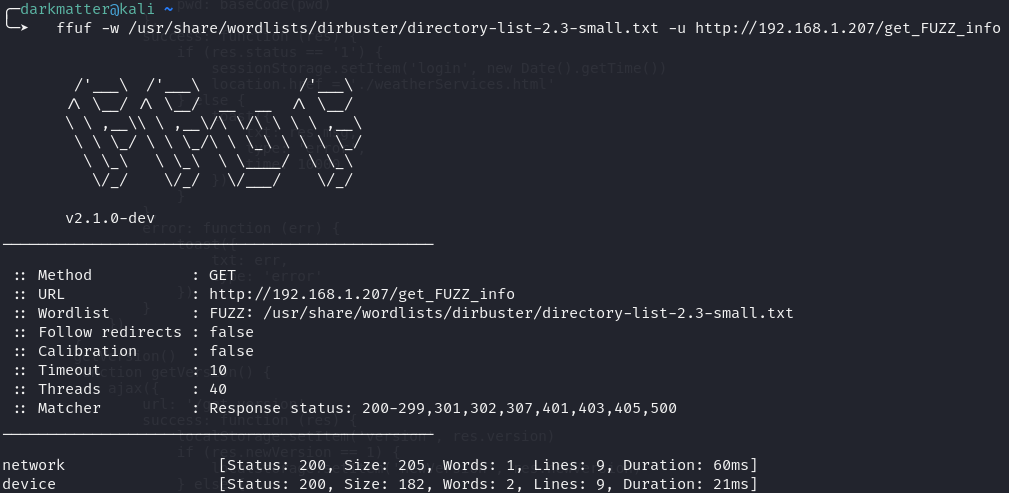
HTTP 200 response codes for us is a great sign, so lets go take a look at what we found.

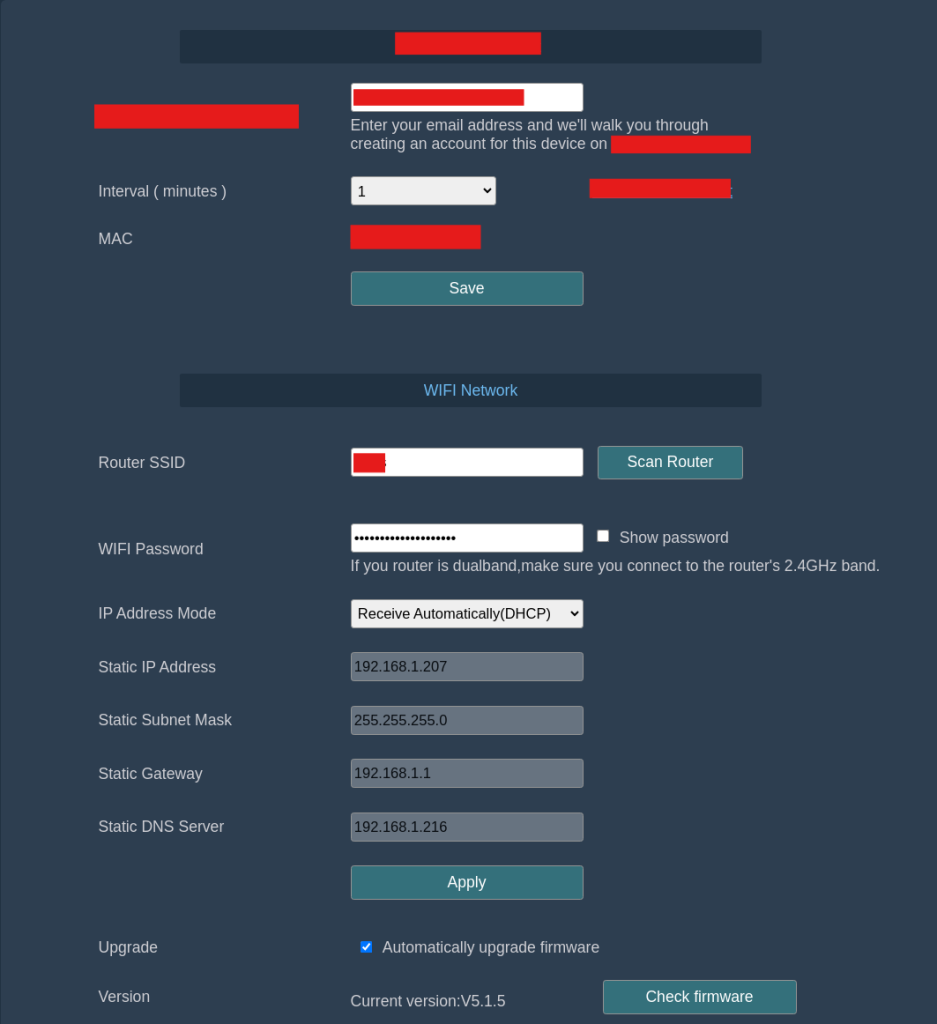
WOAH! Well how about that, navigating to http://<IP>/get_device_info we finally get some juicy information. Another Base64 encryption for an “APpwd”. Decoding the Base64 we get what looks like a user-generated password.
My next thought is lets give this password a try on our login portal. Though the json structure on get_device_info doesn’t explicitly state what it is, you always want to try your cracked/captured/leaked credentials on your login pages.
Sure enough, WE ARE IN! Success!
Hope you enjoyed my findings and learned a few things! This was a fun and surprising one for me. IoT is the wild west and it will only continue to worsen as everything becomes internet connected.
Next: I will be seeing what I can find with the exposed UART pins. Time for root shells. Stay Tuned!
Be aware of what you are buying and make sure you do your best to stay safe out there!